
Like any piece of gear, it will treat you as well as you treat it. We love our gear and with that said we wanted to share all the lessons we have learned over the years so you can maximize your Inflatable stand up paddleboard.
We’ve been known to be a bit over the top when it comes to putting together our owner’s manuals. Our theory is that it is better said than not. We have been super impressed with the innovation in the inflatable SUP’s. A couple of quick things to think about before buying an inflatable stand up paddleboard:
- Go thin to win. If you are not over 175lbs you should strongly consider a 4.75-5-inch sidewall model. The 6” models will be less stable and more susceptible to wind than the thinner models. Heavier riders will need to go with a 6” thick board to optimize stiffness.
- Accessories Matter. Does it have a good bag? A good bag can be a large part of enjoying your board. A quality pump is another big deal.
- Fin Box systems can be proprietary. You are better off getting a model with a standard US Box. That way replacement fins are easy to come by.
- Weight matters - the more expensive models are dramatically lighter than the less expensive ones.

Inflatable Stand Up Paddleboard Owners Manuals
Tips for Caring for your board to ensure a long life
- Do not leave the board in the sun when not being used. Leaving the board in the shade when not in use is critical. With air pressure so high, prolonged exposure to the sun can cause the board to warp or twist. What is happening is that the drop stich fibers are dropping as their glue can melt. Also, most boards are made with PVC and or Hypalon - both of which prematurely age as they are exposed to UV.
- It’s okay to leave the board inflated – in fact we recommend it rather than rolling it and putting it away. If leaving the board inflated but not in use, it's best to take the pressure down to 10 lbs, and then top off to the manufacturer's specifications when using the board next time.
- Never over-inflate your board. Doing so can cause irreparable damage.
- Be careful if using inflator valves and/or compressors. These can easily over inflate your board.
- A freshwater rinse is recommended after use. Storing the board salty can shorten its life span.
- Let the board dry before rolling up for storage. A wet board in the bag that is then left in the sun breaks down the board. Putting a wet freshwater board in the bag can create mold.
- When putting your board away roll it in the same direction every time. Consider using something like a pool noodle to start the rolling process. Avoid folding in such a way that the board seams are creased.
-
 Never use anything to expedite deflation. We have seen countless threads sucked back through the valve.
 - Do not do the 'roll two times to pack up'. Press the air out by keeping the board flat. The message here is that you should try to minimize how many times you roll it up.
- Make sure to use and move every zipper on your bag. Leaving a zipper stationary for too long can result in a frozen zipper.
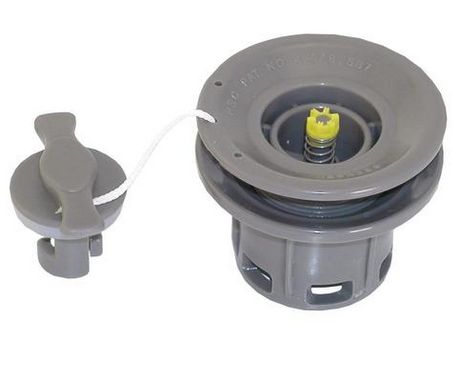
- Hear a small leak in your valve? Use the wrench that should have come in your repair kit in order to tighten the valve and stop the leak.This valve is called a Halkey Roberts and is used on most inflatables. (pictured at right)
How to repair your inflatable stand up paddleboard.
- Use soapy water in a spray bottle to assess whether you have a slow leak.
- Make sure any area needing repair is surgically clean before applying any patch.
- Significantly rough up the area around the repair and on the bottom of the patch. Use 60 grit paper and really rough it up. This texture is necessary to create a mechanical bond on your repair. The rouging area and the patch should extend at least 2 inches around the troubled area.
- If you do not have the glue repair kit that came with your board then we recommend using 3M 5200 FAST. Do not use the 24-hour cure - it must be the FAST cure version.
- Make sure the board is repaired in an environment that is at least 70 degrees. If it’s too cold the glue does not fire as well.
- If possible, try to do the repair with the board totally deflated. If you must, place 1-3lbs of air in it to help give it some structure; for example if the repair is on a corner.
- Use weight or clamps to hold the patch on during the full time required for the glue to cure.
- Before applying the patch warm the area and the patch with a hair dryer. Just make it warm – not hot. This will help the glue fire.
- Do not use too much glue. More is not better. Do make sure the glue is spread evenly and completely covers the patch and the repair area.
- After the initial patch dries, finish with a full bead of 3M 5200 around the seam of the repair area. Think like caulking a bath tub.
With proper care your board will give you years of enjoyment. If you have any tips please feel free to share them by reaching out to us by email at info@101surfsports.com and we will add your best practices to our list.
Below find a few basic how to videos from two of the best inflatable paddleboard manufactures on the market. Starboard and Red Paddle Co.
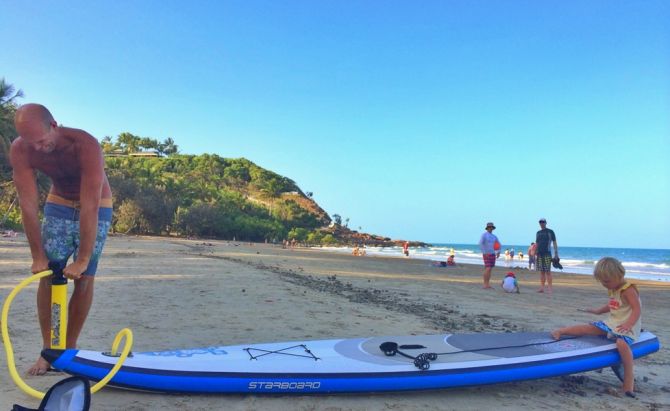
How to inflate your inflatable stand up paddleboard
How to replace, repair, or tighten your valve.
Looking to buy an inflatable stand up paddleboard. Shop our online section where many ship for free. Inflatable Stand Up Paddleboard Shop.

